Contoh proposal kegiatan 17 augustus peringatan hut ri di. Are you looking for the stock ROM firmware of your device Samsung Galaxy Tab GT-P1000? If yes your answer, you are in the right page. We have given the direct link to download Samsung Galaxy Tab GT-P1000 firmware.
Download Samsung Galaxy Tab GT-P1000 Firmware from here, flash it in your device and enjoy the native Android experience again. The download file contains the USB driver, flash tool and the Firmware file.
Feb 24, 2015 How to Re-stock P1000 to Gingebread 2.3 Guide with Links. Yesterday night, i softbricked my galaxy tab p1000 which was running cm9, it turned out like that when i went to recovery and wipe all data, cache, dalvik, even system, and boot. I tried reflashing the cm9.zip but as it was installing its update, my tab suddenly boot into battery. Galaxy Tab P1000N/M16. Solutions & Tips, Download Manual, Contact Us. Samsung Support Caribbean. Skip to content Skip to accessibility help. Choose another country or region to see content specific to your location. See More Close. This site uses cookies. By continuing to browse the site you are agreeing to our use of cookies.
Download Samsung Galaxy Tab GT-P1000 Firmware Stock ROM File Name: P1000XWJQ8_P1000DBTJQ1_DBT.zip Stock ROM File Size: 230 MB Android OS Version: 2.3. How To Flash Stock ROM Firmware On Samsung Galaxy Tab GT-P1000 Step 1: To get started, and install it in your computer. Once done, download the stock firmware of your device and extract the zip file to get the “.tar.md5” file as shown below. Step 2: Next, switch off your smartphone. Once done, boot it into the “ Download” mode by pressing and holding the Volume Down, Power and Home buttons simultaneously. Now your Samsung device will vibrate.
Once you have felt it, keep pressing the Volume Down and Home buttons (leave the Power button) and your device will boot into the Download mode. Step 3: Now you will see a “ Warning” message as shown below. Just press the “ Volume Up” key to continue. Step 4: Next, and extract it to a folder in your computer. Once done, click on “ Odin3.exe” to launch its window.
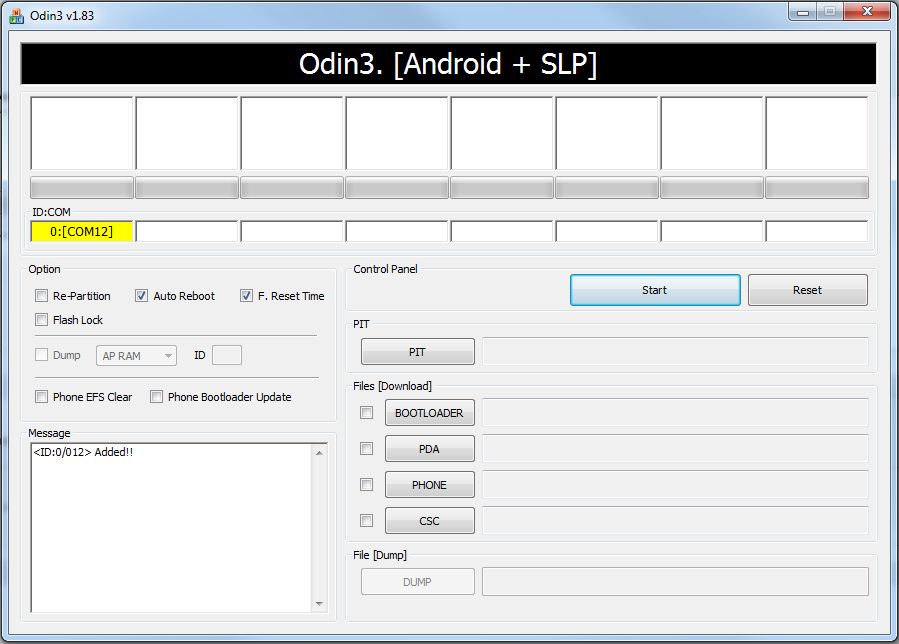
Step 5: Now connect your smartphone to the computer using the original USB data cable. If you have installed the USB drivers of your device properly in the Windows computer, Odin will automatically identify your device and will show a “ Added” message in the “ Log” section.
Step 6: Next, click on the “ AP” button and select the “.tar.md5” file (from Step 1). Step 7: Once the Samsung firmware file is added, click on “ Start” button in “ Odin” to launch the flashing process. Step 8: Don’t do anything during the flashing process. Once it gets completed, you will see the green “ PASS” message as shown in the screenshot below. Ubi caritas gjeilo rehearsal practice.
Step 9: Now unplug your device from the computer. But when you try to boot your device normally, it will get into a boot loop. To fix this error, switch off your smartphone and boot into the “ Recovery” mode by pressing and holding the Volume Up, Power and Home buttons simultaneously. Step 10: Once your device boots into the recovery mode, click on “ Wipe data/factory reset“. Once done, click on “ Reboot System Now” as shown in the screenshot below.